COMING SOON
For your Pre-1840 Adventures! Buckskins & Black Powder Muzzleloading says it all!
Thursday, October 31, 2019
Tuesday, October 22, 2019
Update: Traditions St.Louis Hawken build
As stated, updates on this build will come and are here!
I started off by scraping the lock inlet large enough so the lock would slip in. Normally I have to do a lot of scraping and shaping but this one went in very smoothly with just a little scraping here and there and the lock popped right into place nice and snug. I cleaned up inside the lock panel with some 150 and 220 grit sand paper as well. Always remove any flaky wood chips/splinters!
With the lock fit, I moved on to the barrel channel which needed some scraping and smoothing in order for the barrel to lay down flat. Traditions always leave an unmilled section in the barrel channel and so you will have to use either a file or scraper, even a sanding block and finish it off so the barrel sits down nice and even in the barrel channel.
With the Lock & Barrel now fit perfectly, I moved onto the nose cap which can be a pain in the butt, especially when it comes to drilling the holes! The nose cap may also have to be opened up with a file in order for the barrel to slip in between the nose cap. Lots of prep work on the inside of the nose cap! Remove as many of the burrs and casting marks as possible otherwise it can cause you issues fitting it to the wood. A double cut bastard file makes for easy wood removal as well.
Moving on to the Trigger guard, rather than inlet the wood, I decided to make it easier on myself and just removed a lot of brass on the rear section of the trigger guard until everything fell right into place. I also removed all casting marks left on the sides of the trigger guard. Anything sticking out, WILL leave an imprint on the stock which can be seen by the naked eye. Slow Down - Take your time - Prep the part that you are working on!
Since this kit gun comes with plastic ( Eeeek!!) sights, I am installing real sights. I opened up the dovetail to a standard 3/8" dovetail and tapped in a German silver front blank sight that I will shape when the time comes. The rear sight (Plastic) is held on by 2 screws, So I will have to cut a new dovetail for the new replacement rear sight.
This kit also comes with a Derlin ( Plastic ) Ramrod which is great for swabbing the bore on the range and at home for cleaning, but that's about it. It is to light weight and flexy for any seriously snug load combos you may load into the bore. I replaced this wit ha 9mm Hickory Ramrod and screws on a .50cal Cleaning jag.
Saturday, October 19, 2019
Friday, October 18, 2019
New hunting moccasins
Just had the booshway of the 2020 Santa Fe Trail Rendezvous make these
up for me as he lives about an hour away and invited me over to talk
about the rendezvous. These are brain tanned/smoked elk in 3oz weight
with a thick 3/8" ( maybe slightly less ) cow hide sole.
They fit like glove and the thick leather soles feel so much better on rocks and pointy objects.
Wednesday, October 16, 2019
The patched round ball challenge
I stood by my plan and went full .50cal patched round ball (2017) this season! I
heard a lot of " Don't use that!" You'll wound it!" "That ball isn't
made for big game" all the typical brain washed fubar where some think
you need plastic, SS, scoped and high priced pretty shaped bullets in
order to down game.
I am feeling really good after 9 days of hunting in southern Colorado. We saw plenty of elk, deer, including a real nice muley with a crown of antlers growing off one side of his rack! The weather was a little rainy in the afternoons for the first few days and then finally cleared out to where we were able to get out hunting in the evenings.
On day 1, I found the elk herd, 2 - 2.5miles away. To darn far for packing out in that range of the mountains. We did find a short cut that brought us to within 1 1.5miles, but due to the amount of downed black timber, swampy ground and clump grass, it was worse than trying to hike the regular route.
Day 2, found us watching the elk herd again. There was a real nice butt scratcher of a bull in there with 20+ cows/calves with him. I'd bugle and cow call, he'd look toward the mountain we were on and that was about it. He had his girls and that's all that mattered to him. He rounded up his cows and they went off to bed down in the shade.
On the hike back to the ATV's I mentioned how perfect a setting it would be for a doe to step out into.
15 minutes later, THREE doe stepped out of the aspens! The big lead doe took off, I whistled and it caused the other 2 doe to stop, and the lead doe stopped to look back at them.
I raised my Traditions St.Louis Hawken .50cal kit gun
that I bought from Muzzle-Loaders & spent a month putting it
together. I took aim and squeezed the trigger. BOOM! I sent a .490"
Round Ball, driven by 70gr 3fg Goex, .020" Patch lubed with Frontier's Anti-Rust & Patch Lube toward her. A huge white cloud of smoke hung low in the crisp morning air.The
doe dropped at the sound of the shot. I gave her time to expire while I
reloaded. Afterward, I went up to her and bled her out and couldn't
believe how they just walked out like that! We had crossed that area a
couple hours before!
The shot was a high lung/ bottom of spine shock, shot. It killed her instantly. After she was bled out, We took some pictures and then proceeded to gut her out and drag her back to the ATV, parked at the top of the mountain.
I got her at around 40 yards. She packed the freezer with a little over 48lbs of meat for the winter!
Believe it or not, this year, I found out very clearly... Patched round
balls, leave a BIG entrance hole and a 1/2" exit hole! I thought it
would have been reversed, but it is not so.
The 6th day & One more tag in my pocket:
With having filled my doe tag, the ultimate tag left to fill was my Bull elk tag, which I felt would be impossible due to the bulls not reacting to the calls. They would speak very little and almost at dark when the temps dropped.
On day 4, we found a new hunting zone which the elk funneled into! This place is straight out a painting! The first thought that entered my mind was... A perfect spot for Rendezvous!
A nice small open meadow, a good strong creek running through the west side, heavy aspen growth also on the west side and the east side was a mixture of thick growing aspen and spruce trees. To the north, a heavily beaten elk train going between the gap of 2 mountains, framed by aspen and spruce. Just freakin picture perfect!
It was getting late, around 6:30, and we decided to set up behind a log and start cow calling. I did this for around 15 minutes and then told my nephew I was going to climb up the hill and take a looksee for a couple spikes I saw going over a bald hill. I got 50 yards into the open and all we heard up a loud CRACK! tripping, and more cracking. The area we set up in was on the side that was thickly covered. My nephew and brother were getting all excited, looking around into the thick stuff.
Minutes go by and finally, we hear a weird sound, like a cops bull horn. Apparently they could see the rack of a 4 point bull in all that nasty stuff! There was no way to tell where the body was at any time, so it was a good hunt, just nothing to see other than antlers here and there. The weird sound like the bark an elk makes when he spooks.
We hit this place early the next day and stayed until almost dark when we packed up. It was an amazing place to kick off your boots and just wait the day out.
On day 6, the alarm clock went off and I said to hell with it. After all this hiking, we know where they are, but it's time to just take the morning off. We all went back to sleep, got camp chores done, freshened ourselves up. I was pretty fed up and pooped out on elk hunting by then. All these elk and no way to get them out without killing ourselves.
Around 3:30 PM, I suggested we check out our old hunting grounds, which is a real nasty ATV trail up into the high mountains. This trail had my white knuckling. If I was white knuckling then, I had white hair by the time I got down that same mountain trail later that night, with probably close to 300+ lbs of meat strapped to the ATV.
We got to our old area and took a walk down into a valley where there is a huge meadow and thick aspens. A good deer and elk area. My dad had a deer tag and I wanted him to get one bad.
All we found was that the rancher bordering the Ntl forest, turned his cattle loose in that area. I was pretty upset over that
Hiking back up to the ATV, I said, let's go up the main trail and look down into the little fields/openings along the way. We always see deer when riding along it, so we may as well walk it and see if we can get another doe.
We hike and hike and hike. Finally, we make it to a bowl where its a good sized open area and NOTHING! We were just blown away at how little deer we were seeing over the past few days. Deer should be everywhere, and the were, just the wrong genitals!
We walked down a little ways to a log off in the trees and sat down to rest and and were talking aloud about the area and how crazy it was with the deer. My brother asked if we were ready and of course, nahhh, just a little longer.
We were talking normally about the area again when my brothers eyes pop out of his head.. . HEY! he says in a harsh whisper.... ELK!
A huge cloud of smoke, blinded us until it cleared out in the faint breeze.
My dad and brother start talking and I hushed them up so I could listen for the direction the elk was going.
After, I heard nothing, I pushed the ball down the bore, seated it, capped and slowly started in the direction the elk was standing when I shot. I couldn't see blood, but I did not expect to find any that close to the scene.
Losing light fast ( dark timber ) I gave up on the blood trail and started to go up when I heard some thumping going up towards the north east and then nothing. SHOOT!.... I spooked it! my mind screamed.
Getting lower, I tried to pick up a blood trail but it was just to dark to see in that timber with fading light. I called my dad and brother up and we spread out. My brother looking low, me in the middle and my dad high. I got into the thick timber and it opened up greatly after about 30 yards.
My eyes searched the downed logs and I couldn't see anything so I turned to the right and slowly made my way to my dad when he yelled out... Holy BLEEP!! You got him, he's right here!
We all went nuts, hugging and just in total disbelief that this elk literally, fell into our lap!
There was NO reason for that elk to cross right then and there. No reason for that bull to have stopped when I whistled. No reason whatsoever! It was one of those hunts where you worked your butt off and just as I gave up, we were gifted this elk as a reward for all of our previous hard work.
Again, I used the same rifle for this bull as I did for the deer. My Traditions St.Louis Hawken kit gun in .50 caliber, shooting a home cast .490" round ball, .020" patch, 70gr 3fg Goex and a CCI #11 percussion cap.
The shot in the pictures looks high lung. Its not, its perfectly center, right behind the shoulder. We couldn't get the bull spread out good enough to show it properly due to the mountain side he was on. Plus hes just freaking heavy!
The bull was only 25 to 30 yards MAX when I took aim and sent that little piece of lead through his lungs. The ball destroyed both lungs and exited!
The bull was just drop dead gorgeous. A beautiful tan and dark brown hide, not one imperfection on him. You just have to take a moment and stand back and look at him. A beautiful animal.
Entrance
No exit hole picture. We skinned one side at a time and by the second
side, I had blood running down me after carrying the 1/4's back down
towards the trail.
In end, I can not say enough about how pleased I am with the Performance
of that St.Louis Hawken. It will hang on the wall until next year and
through the winter, I can stare at it now and then and reflect back on
the hunt with that rifle and the memories made.
Guide: Flintlock Muzzleloaders - Getting Started
Getting starting in traditional muzzleloading and need some ideas on what you can use to help you get started?
The Flintlock Muzzleloader helper guide:
Guide: Percussion Muzzleloaders - Getting Started
Getting starting in traditional muzzleloading and need some ideas on what you can use to help you get started?
The Percussion Muzzleloader helper guide:
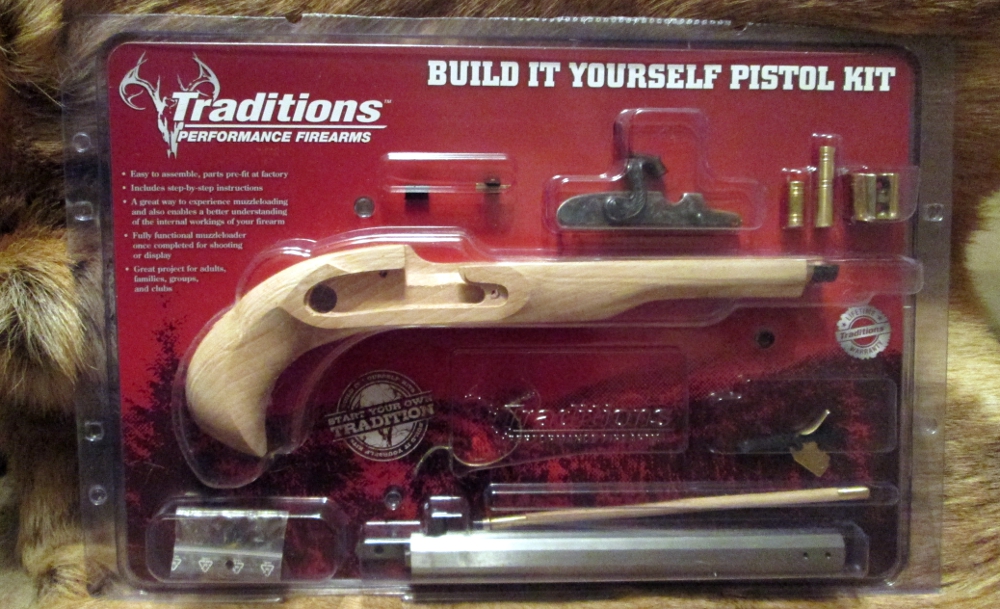
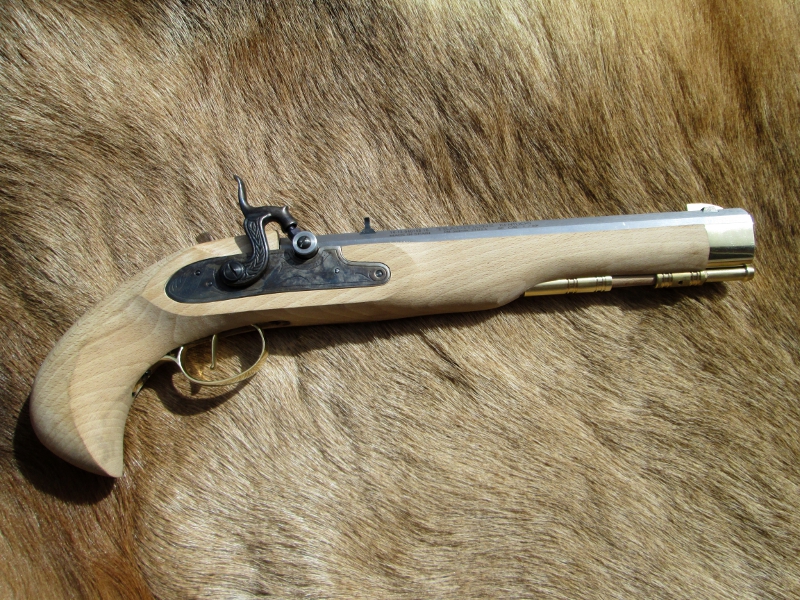
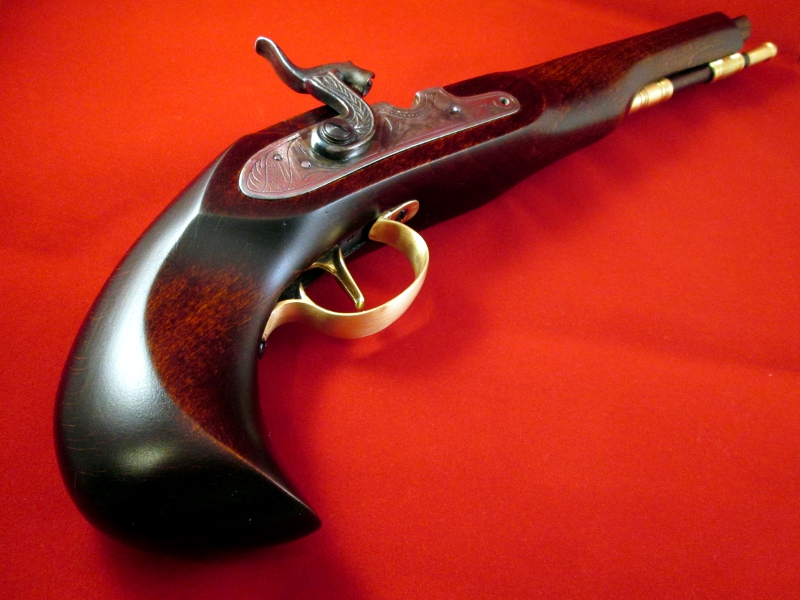
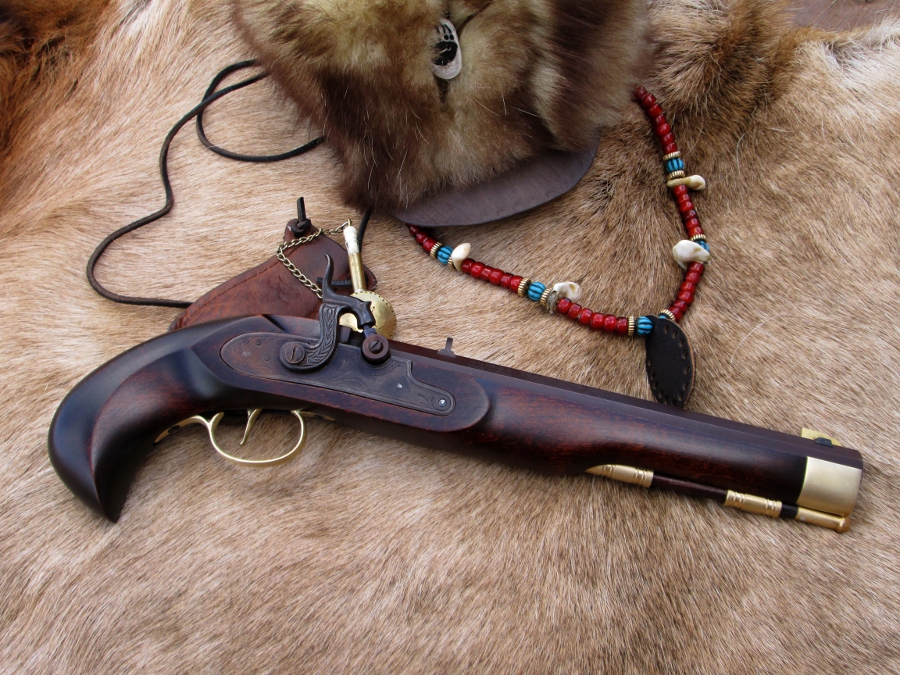
Building the Traditions Kentucky Pistol
Well, You all know I've been wanting a black powder pistol. It was
either the Kentucky or the Trapper pistol kit. I decided on the Kentucky
as its a little more slender, easier on your hip when I tuck it under
my belt.
I finally
opened the box and tore into it, looking everything over. Very simply
straight forward kit! Great looking wood grain, which sadly, most likely
will be covered due to the darker stain I will be using so it matches
my St.Louis Hawken kit rifle I built a little while back.
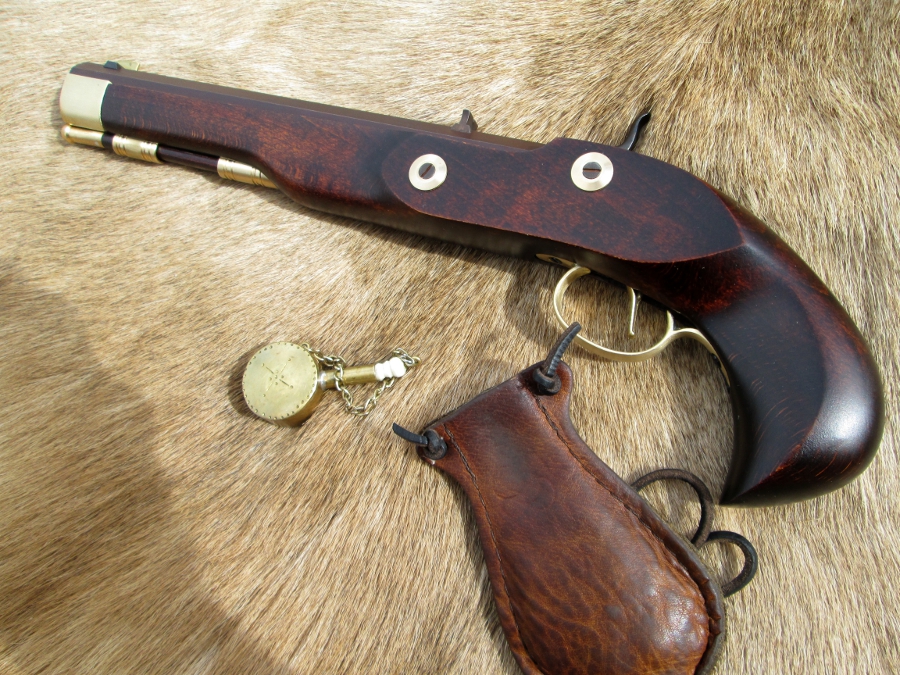
Now just some factory provided info:
KPC50602
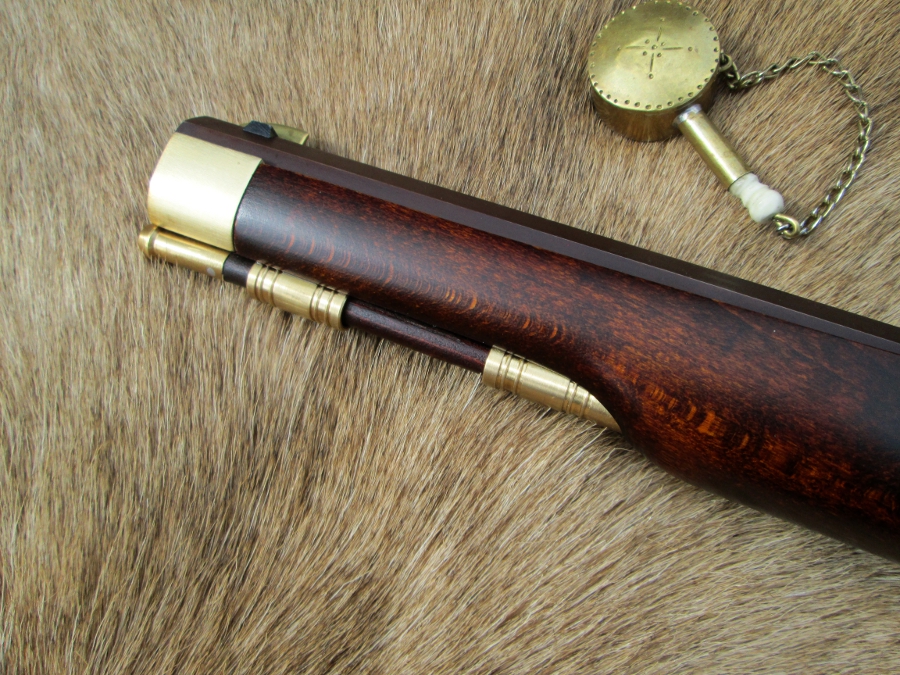
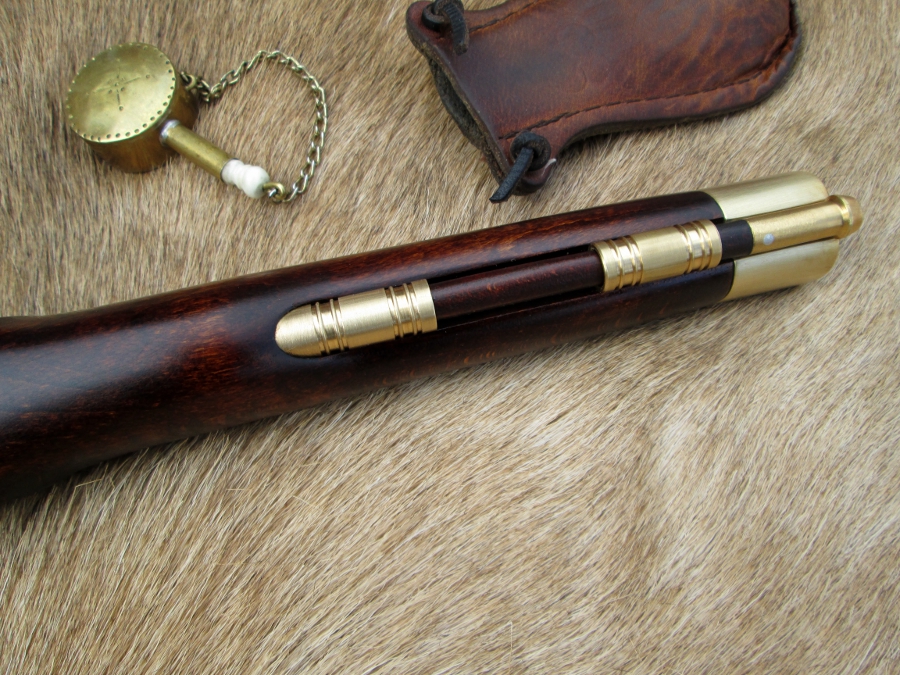
The Traditions Kentucky pistol features a bird's head grip, engraved lock plate, fixed sight, case colored sidelock and brass ramrod thimbles. This pistol will please both collector and novice alike. Whether you are a diehard shooter or just a weekend enthusiast, the Traditions Kentucky pistol will meet all your needs.
Now Just a heads up! If you have large hands like I do, the birds head grip feels a little short. Its a nice chunk of wood to get a good grip on, but just a little short and odd feeling until you get used to it. If I planned on using this as a target pistol, I'd opt for the Traditions Trapper which has a much longer style stock. However, if you have short stubby hands, the Kentucky is best suited for you.
.50 Caliber - 10" Octagon Barrel - 1:20" Twist
Single Trigger - Brass trigger guard - Fixed Blade sights - Wood Ramrod
Weight: 2lbs 6oz - 15" overall length
Available in both Flintlock & Percussion
The Lock also has an adjustable tumbler so you can make the
trigger pull lighter. Mine feels right around 3.5lbs which feels pretty
good right now.
I bought mine from Muzzle-Loaders.com for $199 + shipping and it came Fedex in 3 days.
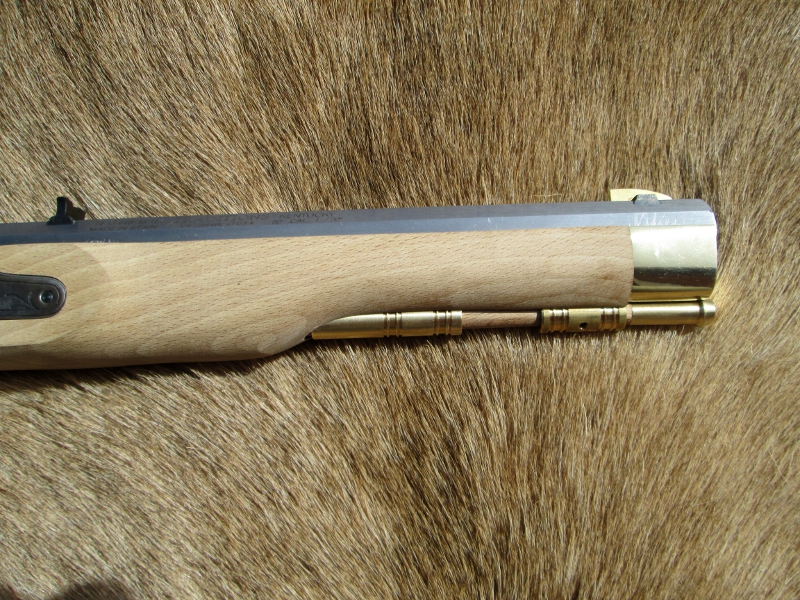
As always, Traditions used Beechwood for the Stock and Ramrod. The ramrod seems very sturdy on this pistol. No cracks or chips were seen, so I started by fitting the nose cap which took longer than expected.
This is my first pistol kit, so some slight errors were made and I will show them. Luckily I caught a couple of them before I did any more damage!
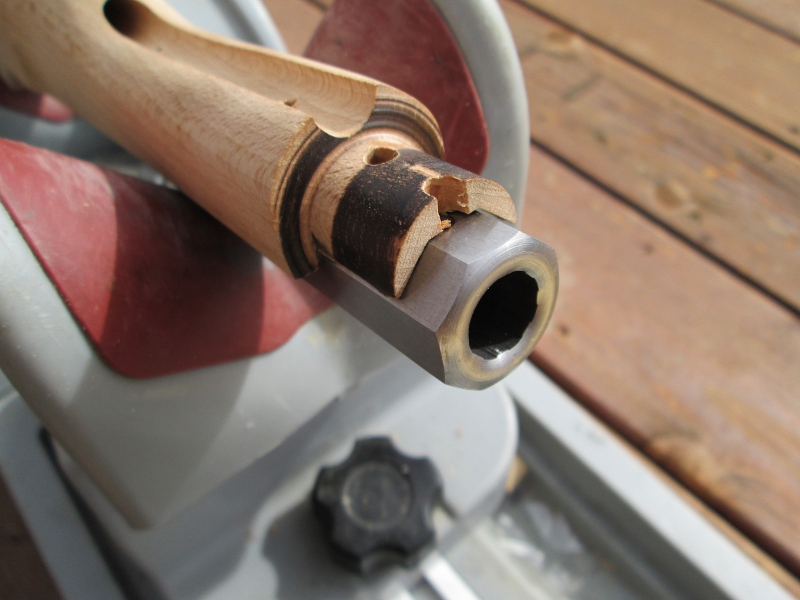
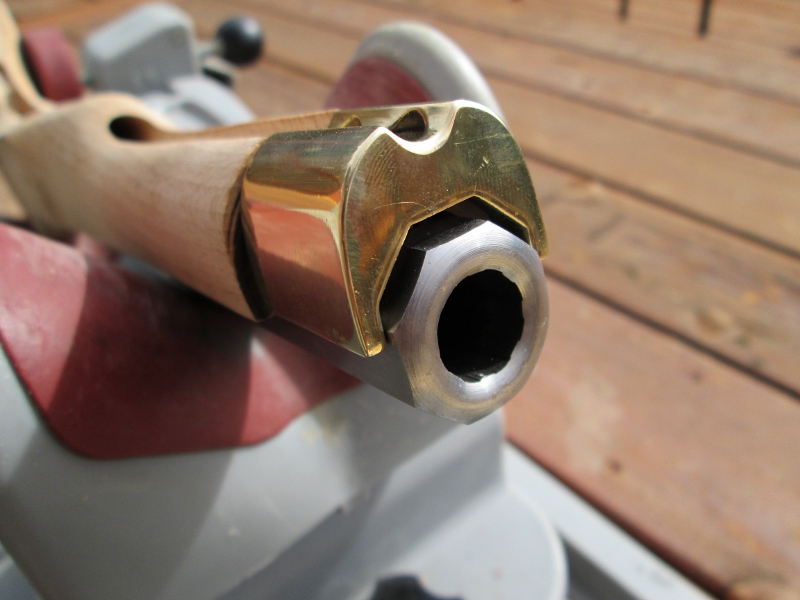
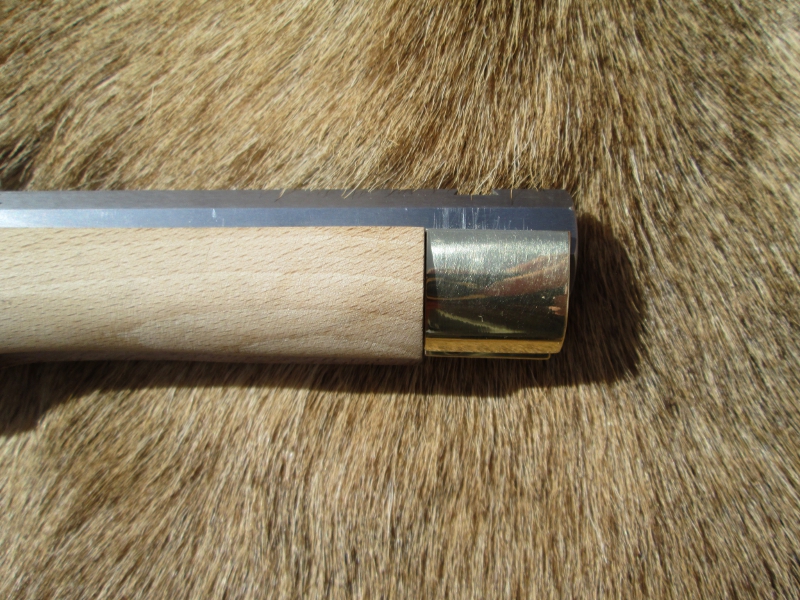
So, Fitting the nose cap took me aprox 25 minutes of slow file and sand paper work. I took a little to much off on one side, so now the nose cap sits above the wood. I will fix this minor issue with an epoxy bedding to even the nose cap with the wood.
Also, The nose cap sat just a slight touch forward of the holes
in the barrel. The screws wanted to go in crooked and you know what that
means! Yes, you could strip out the screws if you forced it.
I corrected this by taking the nose cap into the shop and used a 13/64"
drill bit and enlarged the holes a bit, then used a small round file to
enlarge the holes in the wood stock. This did the job perfectly and only
cost me a few minutes of my time.
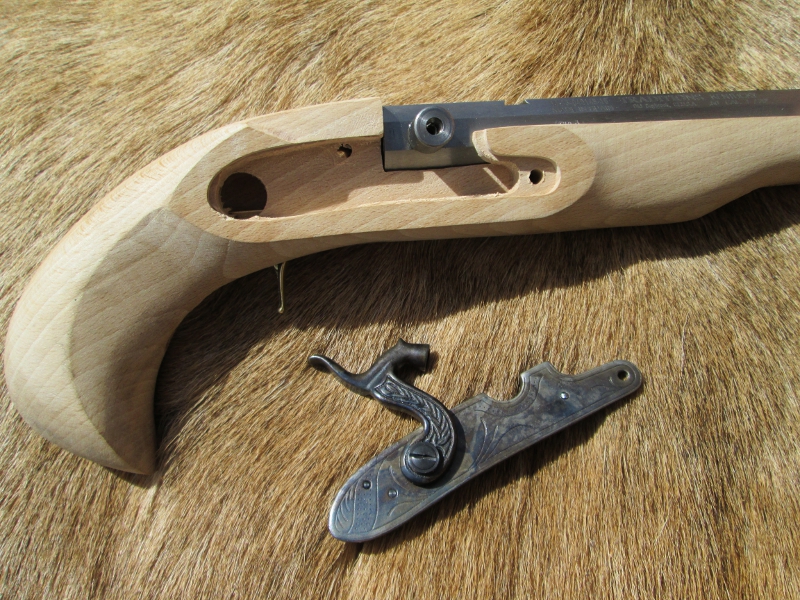
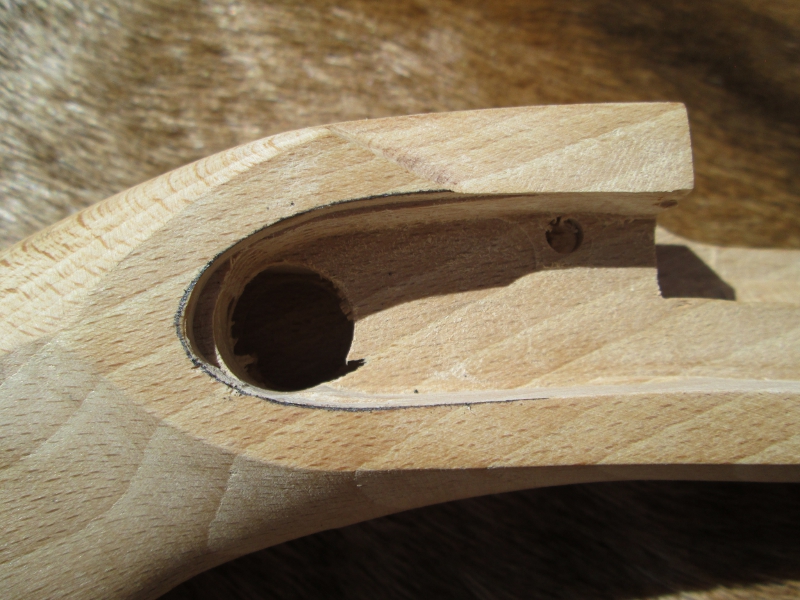
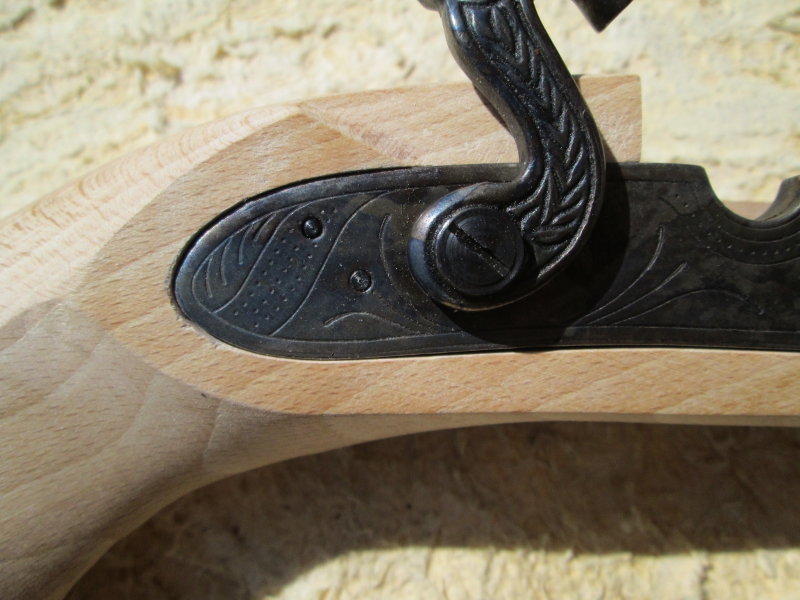
Now with the nose cap in place, I removed the lock from the package and placed it into the stock. No fit! Typical with Traditions kits, they leave you with a little inletting in order for the lock to drop into place. This is easily done my placing the forward section of the lock into the stock and then tracing around the rear of the lock and staying well inside of the marked line.
Now with the nose cap in place, I removed the lock from the package and placed it into the stock. No fit! Typical with Traditions kits, they leave you with a little inletting in order for the lock to drop into place. This is easily done my placing the forward section of the lock into the stock and then tracing around the rear of the lock and staying well inside of the marked line.
After, Note: This is not the final job as I took more time to clean up the inletting and get it nicely shaped.
Moving onto the lock screws, I almost made my first mistake by stripping
out the first screw! I noticed the screw was going in at an angle, so I
had to correct some minor off setting with a round file and make a
little more room so that screw could correctly go through the stock and
into the lock, straight, rather than at an angle. Note: This is
actually mentioned in the instructions guide Traditions sends with each
kit gun. Use a round file or drill bit to enlarge the hole to permit
alignment.
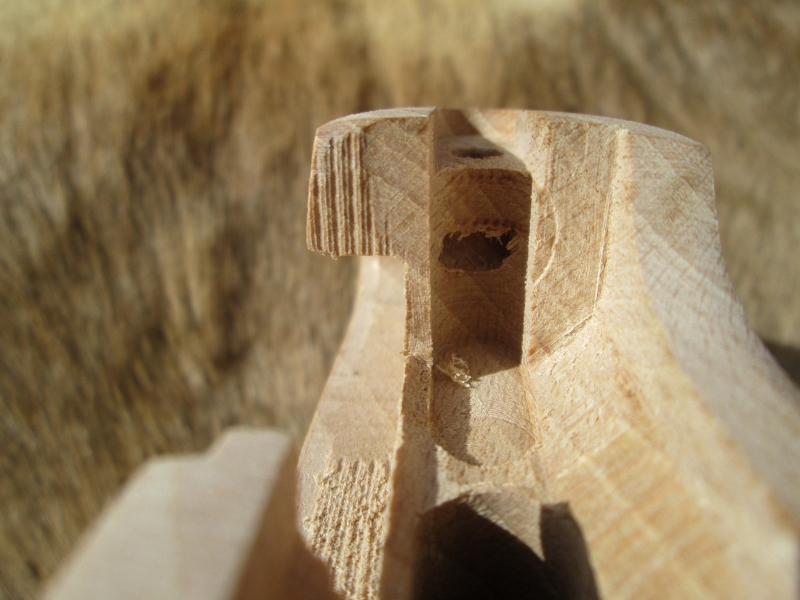
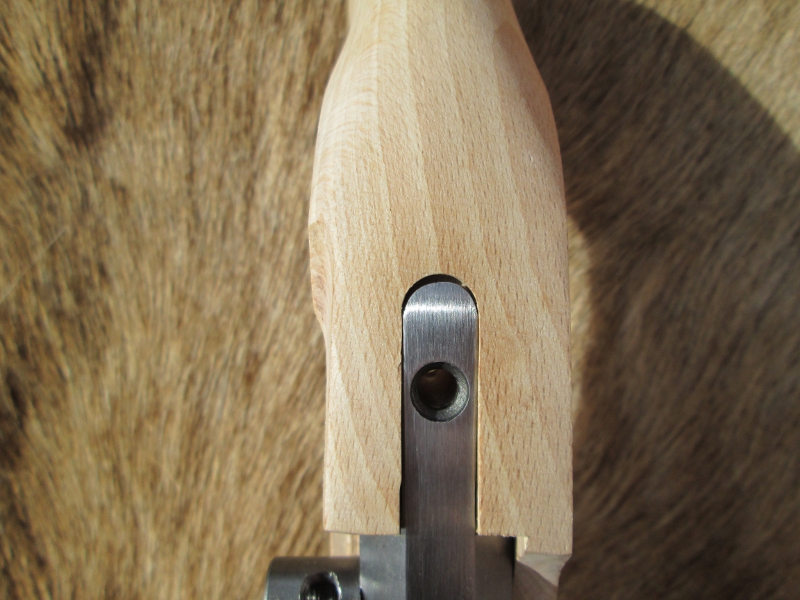
Inside of the barrel inletting, You'll need to file or sand some milling
marks out. Note the small square hole just below the tang inletting.
The breech plug is the tang, so they had to make room for everything to
fit into place. I had to open this square hole up a bit so the barrel
would properly push into place.
Now don't scared off by the slight gap! This looks huge in the picture,
but in reality, is less than .016" which will be perfect for when I bed
the tang and trigger.
Note: Tang hole may need to be drilled out larger or a round file used to enlarge the hole for proper screw alignment. Tang metal may also need filing for proper wood to metal fit.
Note: Tang hole may need to be drilled out larger or a round file used to enlarge the hole for proper screw alignment. Tang metal may also need filing for proper wood to metal fit.
Also behind the barrel/tang, there is less than .008" of a gap, again,
perfect for the right amount of bedding. I do like to bed my rifles as I
tire of the metal eating into the wood during heavy shooting events.
The tang screw just loosens up, accuracy goes to hell and then you start
having to tighten the tang screw more and more until one day, your
rifle or pistol fires off due to the sear hitting the top of the trigger
due to so much wood wear.
Getting back to work, I was able to finish the stock completely and got
it stained! Now the stock from the factory comes super clean, I use both
100 grit to take the wood down where it was needed, and 150 grit to
finish everything off.
However, Before I get to far ahead of myself. Last Night I removed the barrel and used a little JB Weld original
formula, and bedded behind the barrel and the tang. I really feel good
knowing that it's bedded and any little mis alignments are now filled
and level.
When I went to test fit the rear ramrod entry pipe ( ramrod
thimble ) it was very tight and I worried about splitting the wood. It
was also very long and would be impossible to remove if you needed to do
so, sometime down the road. I cut the rear entry pipe down shorter to
where just a 1/4" went into the stock and everything was perfect and I
could remove it easily if needed.
I also was able to remove enough wood by the trigger guard so it was flush with the metal. I did notice that the tang screw was quite a bit longer and pushed into the trigger guard, I will fix this before I get to browning the barrel and other parts.
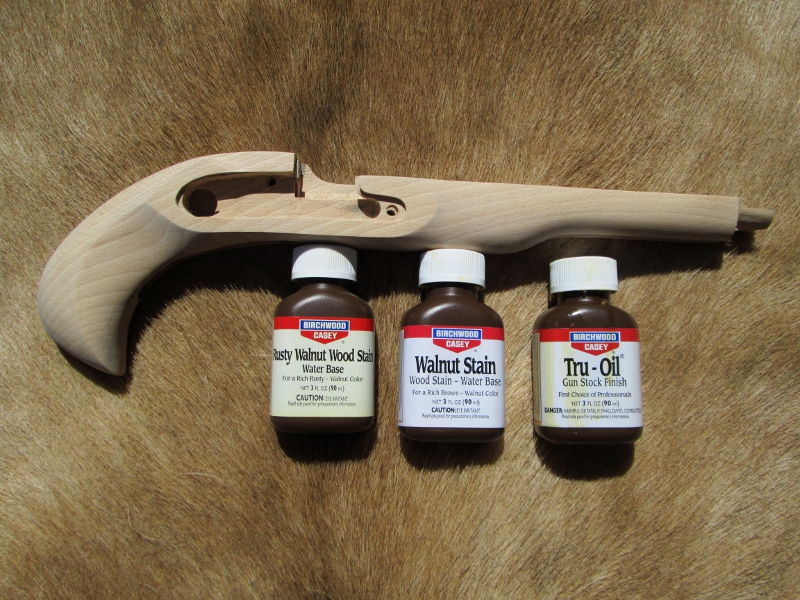
Now with the stock sanded down perfectly, all the lines clean and crisp, I used a soft clean rag and started off with Birchwood Casey Walnut and applied Three coats, before hanging it up to dry and then used 2 coats of Birchwood Casey Rusty Walnut.
After the stain had dried, I used a green scotch brite buffing pad and
knocked down the whiskers for a clean, smooth surface. Once I inspected
for any serious scratches I may have missed, I then got my can of Boiled
Linseed Oil and gave the stock a heavy rub down, inside and out and
allowed the stock to soak that up. I actually gave it 5 good heavy coats
of BLO and it sucked up every drop.
Next I took my Birchwood Casey Truoil and mixed it into a small separate
container that had BLO, and mixed them together. You can get more work
time with Truoil when you dilute it with boiled linseed oil, plus it
seems to pull deeper into the wood, rather than build up right away.
I did 3 coats of this, before hanging it up to dry for the night.
I did 3 coats of this, before hanging it up to dry for the night.
After the stock was finished, I then took the lock apart which was a
real chore! That hammer is set onto the tumbler very tight and I used a
small punch and placed the lock between two 2x4's and gently tapped the
tumbler out of the hammer.
Once removed, I used Birchwood Casey blue & rust remover to clean the lock, then degreased it and used Plum Brown solution to brown the lock plate and hammer. This I simply used a propane torch and heated the hammer and lock plate until a drop of water sizzled, then wiped the solution on with a wet cotton towel. I did 3 coats for a nice looking finish.
Also while browning the lock, I took the time to prep all the blued screws and brown those as well so everything matched.
A light coating the lock internals after browning and re-assembly, I used a very thin coating of Frontier's Anti-Rust & Patch Lube on the internals of the lock.
This kit pistol was a great project and easy to put together. There are areas that I could certainly improve on, but as with everything, Practice makes perfect! I can live with the small mistakes I made along the way, simply from not having any experience with these pistol kits!
The kit went together with minimal tools needed other than a couple
round files and of course our typical every day flat file for working on
metal parts and shaping the fore end of the stock at the nose cap. With
patience and a good sanding block, you could actually assemble the kit
without the flat file, but you WILL need a couple small round files to
properly align lock screw holes and the nose cap screw holes.
Please take note of the finish on the stock. On my St.Louis Hawken I did
not put the Truoil on heavily to where it looked like it was dipped in
glass. I normally do high gloss finishes with Truoil, but because this
my main hunting set up, I wanted something with more "feel" to it and a
finish that was less slippery. This stock still has some grain to it
when I touch it, it's not slippery.
The barrel was browned with Laurel Mountain Forge browning solution.
This matched up great with the Birchwood Casey Plum Brown solution.
The birds head grip is really an attractive addition to this pistol!
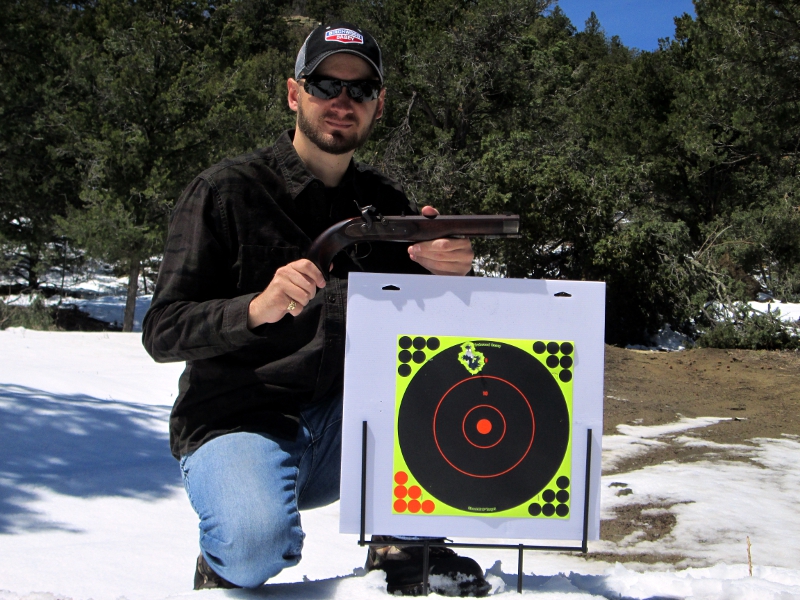
After shooting the pistol a few times, I feel I might the right choice
with the Traditions Kentucky pistol kit. At first it felt weird, like it would pop
out of your hand under recoil, but my thinking was very incorrect. The
Kentucky may feel small if you have big hands, but with a little time
and handling, this is a very comfortable pistol to shoot and carry
tucked into your wide leather belt.
Subscribe to:
Posts (Atom)


